Source Code (SVN) Repository Access
- Server Connectivity
We have created a Subversion (SVN) repository using the A2 HOSTING service in order to handle source control for the application following instructions found in this article.
Since we are a team, the versions of each file must be controlled.
We follow the A2 HOSTING instructions to allow multiple SVN users without releasing account password to every member that joins us. These procedures require that we do the following:The main steps for setting up multiple-user Subversion access are:
-
Each user creates an SSH key pair and sends the public key to the account owner. The owner adds the public key to the account's ~/.ssh/authorized_keys file on the server.
-
Each user configures a Subversion client to use his or her private key to access your account's repositories.
As a result, we will need that when you have a chance, please generate a key pair and send the public key to us as explained in the following article:
How to access your account using SSH keysIf you are using Windows, you will need to download PuTTYgen to generate your key pair and PuTTY to enable SSH connectivity.
Before generating the keys, make sure that the parameters are set as show in the image below.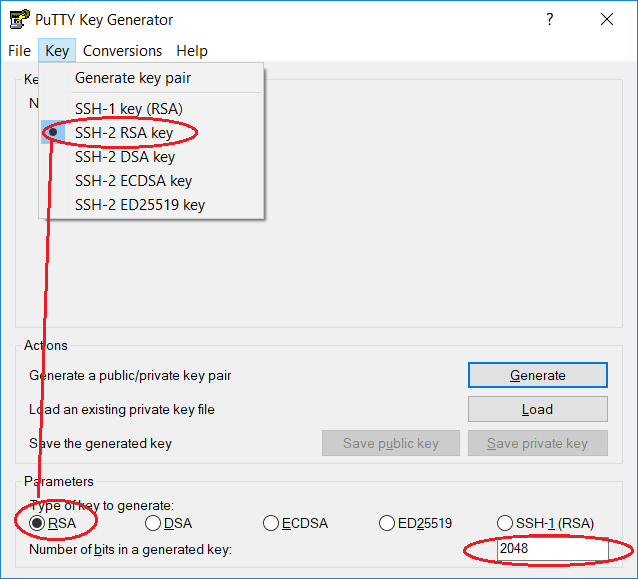
It is very important that while PuTTYgen is generating the keys, you move your mouse randomly in order for your key to acquire a random value.
To create a public key file, DO NOT USE the PuTTYgen Save public key option. Instead, cut and paste the whole content of the PuTTYgen public key window into a text editor, save the file and send it to us. If you use Windows, the text editor would be
 Notepad.
As soon as we add your public key to the server at A2 HOSTING, we will let you know.
ONCE WE NOTIFY YOU, you may proceed to:
- Enable SSH access.
- Configure the SVN client on your side.
Note: These instructions are focused on the Windows OS. If you use another operating system, please notify us if you need help on enabling SSH connectivity and to find a suitable SVN client.
Windows is NOT MANDATORY to work ins this project.
We will be happy to help :-)In order to enable SSH connectivity using PuTTY, you will need the following information:
Hostname required by PuTTY zenoahos@mi3-ss40.a2hosting.com SSH Port 7822 Please note that this provider does not use the typical Port 22 for SSH access. Instead, it uses 7822.
You may reference to the image below when creating the PuTTY session configuration.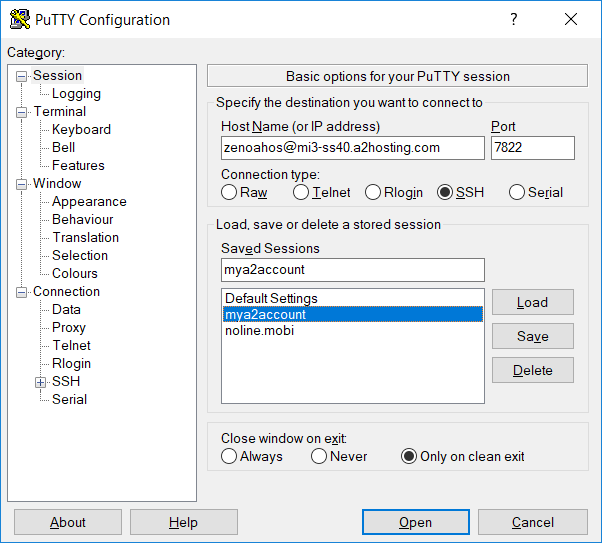
You will need the name of the saved session in PuTTY to access the repository from TortoiseSVN.
In the example above, it is: mya2account. -
Each user creates an SSH key pair and sends the public key to the account owner. The owner adds the public key to the account's ~/.ssh/authorized_keys file on the server.
-
Client Access - TortoiseSVN Example
Just as described in the SVN configuration instructions, we are using the TortoiseSVN client in our example.
After installing TortoisSVN in your computer, go to the Settings by doing a right-click on the desktop and selecting TortoiseSVN>Settings.Then select the Network options.
At the SSH section, browse to search for the TortoisePlink client application in the C:\Program Files\TortoiseSVN\bin folder and Apply your change.
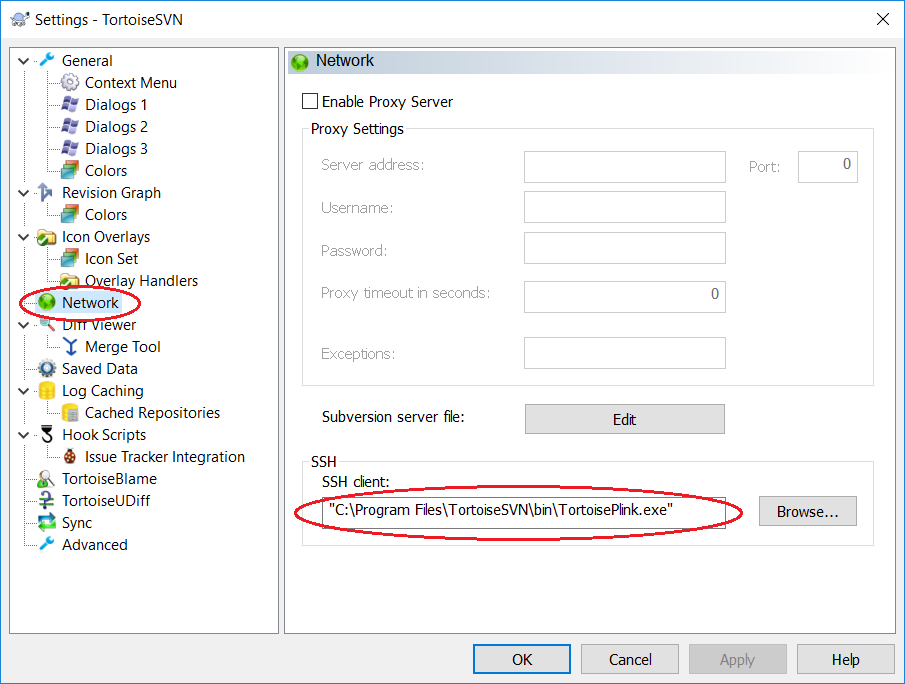
Close the Settings window and try to access the repository by doing a right-click on the desktop and selecting TortoiseSVN>Repo-browser: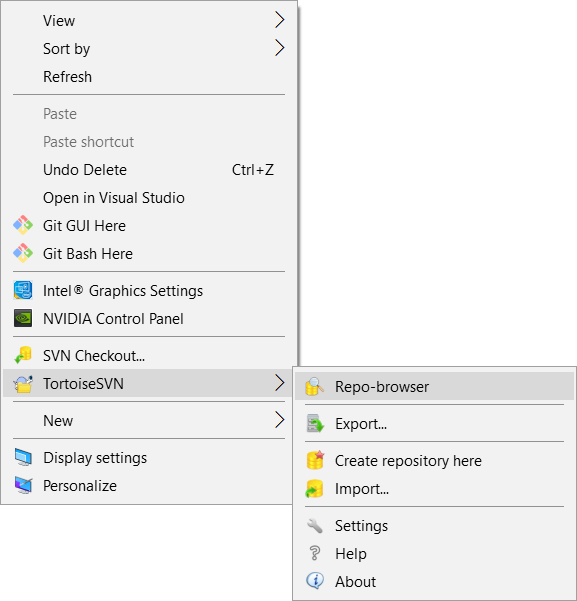
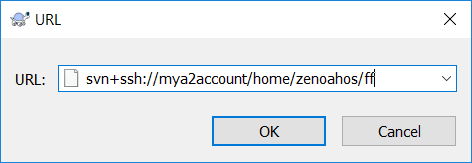
The URL of the SVN repository that must be provided to Tortoise is formed as follows:
svn+ssh://PROFILE/home/USERNAME/REPOSITORY
In our case this information is:
USERNAME: zenoahos
REPOSITORY: ff
Therefore, if you use the same name for the PuTTY session as we did, then the URL that must be provided to TortoiseSVN to access the repository is:
svn+ssh://mya2account/home/zenoahos/ff
If you have problems, please let us know.